This is a tutorial for Java developers with some background in web technologies who want to learn how to bring up a web server in GAE. At the end of this tutorial you should not only have a functioning web service in GAE but also a base for building a maintainable GAE based service. To this end of building a maintainable system we will be using Maven as our underlying build system. If you are not familiar with maven, you owe it to yourself to get familiar with it as it will make your life much easier, and we will help you do that in this tutorial.
Tools of the trade
-
Java: If you do not installed Java please do so now, the latest version can be found here. Once you have installed Java open a command line terminal and type java -version and make sure its installed correctly.
-
Maven: If you do not already have maven installed please install the latest version of Maven 3 which can be found here. Once you have maven installed type mvn -version to make sure its installed correctly.
-
Guice: We will be using the Guice Injection Framework to simplify our code setup, if you are not familiar with Guice don’t worry we walk through all the steps in this tutorial. However, if you are serious about writing web services in Guice do read up about Guice here.
-
Sitebricks: We will be using the Sitebricks web framework on top of guice to actually serve our requests. Again don’t worry if you are not familiar with Sitebricks we will walk through the setup in this tutorial. In general I have found sitebricks to be a great tool for basic web-services although you should use something more full featured such as Jersey for larger services.
Generating your Skeleton Project
To generate a skeleton project run the command shown below into your terminal. In this command we are specifying the location of location of our project in the maven project namespace with the “groupId” parameter. It is standard to use the inverse of your web domain as your group id. for example if you work on a project called helloworld for a company called flybynight which is hosted at www.helloworld.flybynight.com, you might use com.flybynight.helloworld as your group id. The “artifactId” parameter is a unique identifier for your project e.g. helloworld. The “archetypeArtifactId” and “archetypeGroupId” tell maven that you want to create an application using the “skeleton-archetype” template which can be found in the “com.google.appengine.archetypes” group.
1
2
3
4
5
6
mvn archetype:generate -B \
-DarchetypeGroupId=com.google.appengine.archetypes \
-DarchetypeArtifactId=skeleton-archetype \
-DgroupId=com.flybynight.helloworld \
-DartifactId=helloworld \
-Dversion=0.1-SNAPSHOT
After running this command you will see a lot of console output which is generated by maven downloading everything it needs to build your project. Eventually you should get the build success message. You should now have a helloworld sub-directory in the current directory which contains a file called pom.xml, a directory called src.
Updating your project settings
First open the appengine-web.xml file at src/main/webapp/WEB-INF/appengine-web.xml, it should look like the text below. Your application name is specified in this file in the application tag. Choosing your application name is important because it will be part of the URl for your application once uploaded and has to be globally unique. http://helloworld.appspot.com has already been taken so change it to something more unique. The threadsafe parameter specifies whether one instance of your web server (when deployed) can can handle more than one request concurrently. Unless you are doing something really weird this should always be set to true.
1
2
3
4
5
6
7
8
9
10
<?xml version="1.0" encoding="utf-8"?>
<appengine-web-app xmlns="http://appengine.google.com/ns/1.0">
<application>helloworld</application>
<version>${appengine.app.version}</version>
<threadsafe>true</threadsafe>
<system-properties>
<property name="java.util.logging.config.file" value="WEB-INF/logging.properties"/>
</system-properties>
</appengine-web-app>
We can now test that we have everything setup by running mvn verify to compile all our code and make sure there are no problems. We can also test if we are able to run our web service by running mvn appengine:devserver, this should run a service on port 8080 and can be reached by typing http://127.0.0.1:8080/ into your browser. If you hit this URL right now you will get a 403 error because we have have no code to handle requests.
Building your service
We have now setup the basic tools to build and run our web server but we still need to write code to serve requests. To write a very simple service we will be using the Sitebricks and the Guice frameworks. In order to download the Guice and Sitebricks libraries open the pom.xml file and look for the dependencies tag. Add the following dependencies.
1
2
3
4
5
6
7
8
9
10
<dependency>
<groupId>com.google.inject</groupId>
<artifactId>guice</artifactId>
<version>3.0</version>
</dependency>
<dependency>
<groupId>com.google.sitebricks</groupId>
<artifactId>sitebricks</artifactId>
<version>0.8.8</version>
</dependency>
Hooking up Guice
Now we must tell our application that we will be using Guice to intercept all http requests and manage all our content using google magic. For this open up the web.xml file (/src/main/webapp/WEB-INF/web.xml). In the __
1
2
3
4
5
6
7
8
9
10
11
12
13
14
15
16
17
18
<?xml version="1.0" encoding="utf-8"?>
<web-app version="2.5" xmlns="http://java.sun.com/xml/ns/javaee"
xmlns:xsi="http://www.w3.org/2001/XMLSchema-instance"
xsi:schemaLocation="http://java.sun.com/xml/ns/javaee http://java.sun.com/xml/ns/javaee/web-app_2_5.xsd">
<filter>
<filter-name>webFilter</filter-name>
<filter-class>com.google.inject.servlet.GuiceFilter</filter-class>
</filter>
<filter-mapping>
<filter-name>webFilter</filter-name>
<url-pattern>/*</url-pattern>
</filter-mapping>
<listener>
<listener-class>com.flybynight.helloworld.GuiceCreator</listener-class>
</listener>
</web-app>
Creating the sitebrick
Now lets create the sitebrick which will handle web requests. Create a Java class called HelloWorld.java int the com.flybynight.helloworld.rest package for our sitebrick. The code for this class is should below. Note the @At annotation tells guice that this sitebrick should be served for requests to the base URL.In addition since we are not using an html based view we also add the @Service annotation to mark this Sitebrick as service only. We have one method in the class called getMessage which is annotated with @Get to tell sitebicks to use this method in response to a Http Get request. We could also use @Post, @Head etc to add methods which respond to other standard http request types.
1
2
3
4
5
6
7
8
9
10
11
12
13
14
15
16
package com.flybynight.helloworld.rest;
import com.google.sitebricks.At;
import com.google.sitebricks.headless.Reply;
import com.google.sitebricks.headless.Service;
import com.google.sitebricks.http.Get;
@At("/")
@Service
public class HelloWorld {
@Get
public Reply<String> getMessage() {
return Reply.with("Hello World!!!!");
}
}
Configuring Guice Injection
Even though we have our sitebrick based service class ready we still have not told guice to use it. We do this by creating the GuiceCreator class that we referenced earlier in the web.xml file. Create a java class called GuiceCreator in the com.flybynight.helloworld package and add the code shown below. The code tells Guice that we will be using sitebricks to host our content and that our sitebricks live in the package which contains the HelloWorld class. The scan call is telling Guice to scan the classes in that package and look for the @At annotations to identify the brick classes.
1
2
3
4
5
6
7
8
9
10
11
12
13
14
15
16
17
18
19
20
21
22
23
package com.flybynight.helloworld;
import com.flybynight.helloworld.rest.HelloWorld;
import com.google.inject.Guice;
import com.google.inject.Injector;
import com.google.inject.servlet.GuiceServletContextListener;
import com.google.sitebricks.SitebricksModule;
public class GuiceCreator extends GuiceServletContextListener {
@Override
protected Injector getInjector() {
Injector injector = Guice.createInjector (
new SitebricksModule() {
protected void configureSitebricks() {
// scan class Example's package and all descendants
scan(HelloWorld.class.getPackage());
}
}
);
return injector;
}
}
Testing your service
That is it, we now have a working deployable GAE service which can handle http requests. In order to test your service run mvn appengine:devserver and hit this the following URL in your browser. http://127.0.0.1:8080/
Deploying your service
 Now that you are ready to deploy your service you should register for an app name. You can register for a free app at https://appengine.google.com. Once you login click the Create Application button. Specify your Application Identifier and title for your application. The rest of the fields can be left set to default. We used helloworld-uismail as the identifier and Hello World as the title. Note that the identifier becomes part of your application’s public URL so choose wisely. Once you have chosen a identifier and title hit Create Application and update the identifier in src/main/webapp/WEB-INF/appengine-web.xml under the application tag.
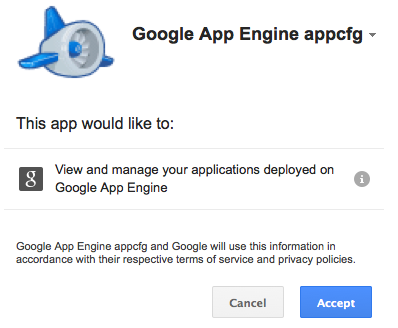
Now run mvn appengine:update in your command line, a browser window should pop up asking you to login to google and verify that maven can upload an application on your behalf. Click verify, copy the string from the next screen and paste it into your command line. Once maven is finished you should be able to test your remotely deployed app at http://[Application-ID].appspot.com, hit the URL in your browser and see your hello world message.
Here’s one We made earlier
Our deployed version of the GAE hello World project can be found here http://helloworld-uismail.appspot.com and all source code created for this tutorial can be found here https://github.com/techtraits/gae_helloworld. Happy coding and please ask any questions in the comments section.